Spinning Treats Interactive Card
- NOLAstamping
- May 20, 2021
- 3 min read

The Spinning front thin cuts are so much fun to play with and this new stamp set out of the May/June catalog is so adorable - it was so much fun to put together and play with after it was made!
First, I always cut out the thin cut shapes first, then stamp and color. That way if you spend alot of time coloring in something, you aren't heartbroken if the die doesn't line up correctly. So first I cut out the ice cream cone, the cupcake and the latte out of White Daisy. I used the tri-blend markers to color them. I used the lightest brown-grey on the lid of the latte, and then filled in with the darkest two colors of pale pink. For the ice cream cone, since the faces would be so colorful, I kept the scoop white and then colored in the cone with golden brown. And the cupcake I went wild on - using the purple for the frosting and tan for the liner.

I took a piece of 4-1/4" x 5-1/2" Lilac cardstock and stamped the sprinkles and circles randomly around the top of the card in Lilac ink so that it would be some tone-on-tone stamping look.
Once they were colored in, I set them aside and then cut out the rest of the pieces for the card. I white embossed the "Celebrate" sentiment on a grape piece of 1/2" x 4-1/4" sentiment strip, then cut the pink pattern paper from Hillside Cottage paper pack just over 4" wide by 2-1/2" tall and layered the 1/2" grape on top of a base of 4-1/4" x 5-1/2" Lilac cardstock. For the card's stability I thought it was probably a good idea to have a base that goes all the way where the card would normally be.
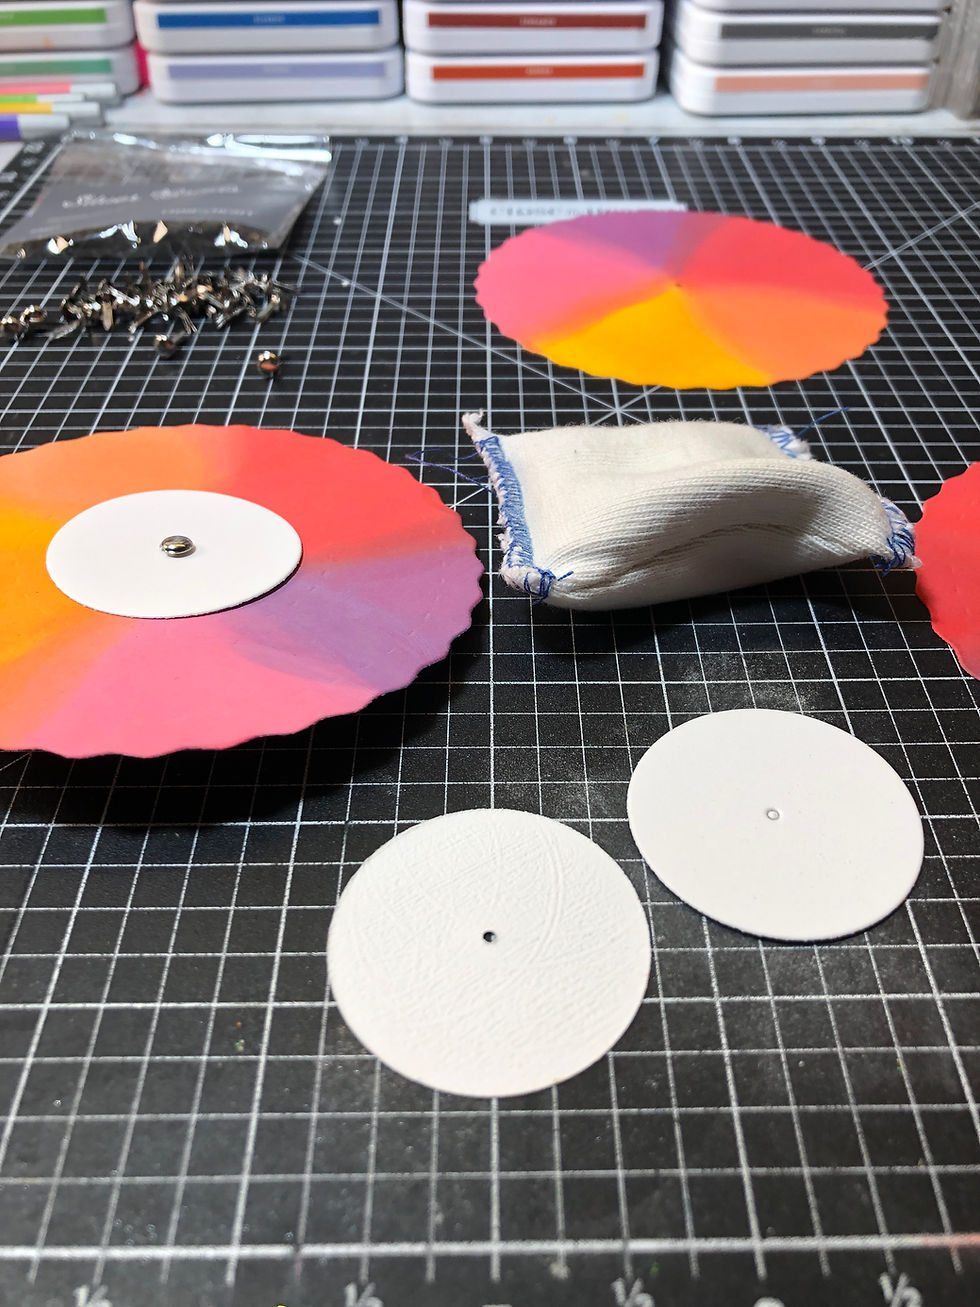
So I layered the bottom parts together and then ran it thru my cuttlebug so that everything would line up together perfectly. Then I cut out the two circles and the interior spinning wheel that make up the mechanism for the spinning card front.

Just for fun, I used distress oxide inks and created a fun rainbow gradient on the interior sentiment wheel. The thin cut cuts little stitch notches where it will show through, so that's what I used to stamp in the little faces for the ice cream cone.
I like to use my anti-static pouch to coat the two spinning circle mechanisms in between the circle and the card so that they spin a little more easily. Then I took a silver brad and stuck the whole mechanism together.
I am a huge fan of 3-D foam tape, so in order to give the mechanism enough room to move, I put 3-D foam tape on the top and the back of the brad and all the way around the edges of the card front.

For a nice finished look, I cut a piece of 4-1/4" x 5-1/2" Grape cardstock and adhered it to the white card base, so that there would be a grape frame around the whole card. Then I attached the Spinning card front mechanism to the Grape cardstock, leaving an equal frame around the card. I embellished the top Lilac cardstock with a few clear sparkles and spun the card around several times to make sure it worked!
But you can embellish as desired - here's a list of the products used, please do reach out and let me know if you have any questions! Thanks & stay crafty!
Stamp Sets: Z3957 Desserts a la Whirl Stamp & thin cut set
Ink/Coloring: Intense Black Ink Pad (Z4189) Lilac Ink Pad (Z6506) Mustard Seed Distress Oxide Ink (Z3830) Candied Apple Distress Oxide Ink (Z3826) Picked Raspberry Distress Oxide Ink (Z3827) Seedless Preserves Distress Oxide Ink (Z3835) Spiced Marmalade Distress Oxide Ink (Z3829) Versa Mark Ink Pad (Z891) White Embossing Powder (Z2068) Tri-Color Markers
Papers: Lilac Cardstock (X6041) - thin cut card front Hillside Cottage Paper (X7268B) - half of thin cut card front Grape Cardstock (X6054) - 4-1/4" x 5-1/2" & 1/2" x 4-1/4" White Daisy Cardstock (1385) - thin cuts White Cards & Envelopes (X254)
Embellishments: Silver Brads (Z3627) clear sparkles (Z3274)
Tools: Card Front Spinner Thin Cut (Z3626) 3-D Foam Tape or Dots or Squares Adhesive Anti-Static Pouch (Z4220) Non-Stick Micro-Tip Scissors (Z1836)


Comments